
Plentiful Pierogis
By Kaitlyn Lynch • April 30, 2018
Pierogis: delectable Polish dumplings that can be devoured in any form with any flavorful fruit or savory filling.
Okay, so that’s not the real definition for a pierogi, but in my opinion it sure does come close. Pierogis are a Polish holiday tradition and have been since they were created in the thirteenth century. But pierogis don’t only exist in one form—they can be savory and sweet. There are a multitude of flavor combinations that may include mushrooms and sauerkraut or fresh strawberries and an airy mousse.
Yet, the most popular (rather common) pierogi is the pierogi ruske, also known as the Russian Pierogi because of Russia’s influence on Poland. The flavors of this pierogi include a creamy mixture of potatoes and cheese with tiny bits of crispy onion, all wrapped in a light dough which may be boiled and pan-fried to perfection.
The pierogi ruske is the pierogi we will be creating today. Before beginning, please note that I cut each ingredient amount in half to produce a smaller yield. It should create about thirty scrumptious pierogis.
There are two components to this dish: the filling and the dough. It is up to personal preference which one you start with, but I started with the filling to give the potatoes enough time to cool in the refrigerator after boiling them on the stovetop.
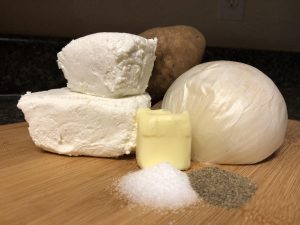
Let’s begin fixing the filling. For this part of the recipe, you’ll need to gather up the following ingredients: two potatoes, half an onion, eight ounces of farmer’s cheese, a quarter of a cup of shredded colby-jack cheese, half a teaspoon of salt and pepper, and one tablespoon of butter.

Before touching any of the ingredients, I set a pot of water on the stovetop so that the water may begin to boil. At this point, I added a few shakes of salt into the water to begin flavoring the potatoes. Now that the water was set to boil, I set to attack the potatoes. Using a peeler, I peeled one pound (roughly two medium-sized) of potatoes until naked and placed them into the “hot tub” waiting for them on the stove. The potatoes boiled in the hot bath till they were soft enough to mash.

While I waited for the potatoes to finish, I began my work on the onion. To protect myself from the onions fierce fumes, I stood a fair distance away from the cutting board while I minced the white onion. After tackling the onion, I put the tablespoon of butter into a frying pan set to low-medium heat for the next few minutes. Before taking the minced onion out of the pan, I made sure each piece was a perfect light brown color.

With the onion set aside, I moved on to crumbling the farmer’s cheese. While this may sound like a “hard to find” ingredient, it can be found in any large supermarket. I found mine in Publix by the cream cheese. With a fork, I crumbled up the farmer’s cheese and set it aside into another bowl.
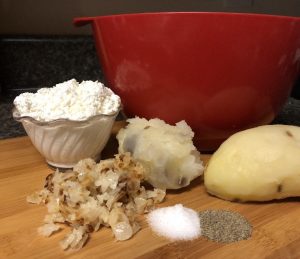 By this time, my potatoes were soft enough to be removed from the water and placed in a bowl in the refrigerator to cool down. While they sat in the icebox to chill, I began to craft the dough. But, once the potatoes were cooled, I began to mash them until the pieces of the potato were in much smaller bits. While I continued to mash I added the cheese, the onion, and a ½ of pepper and salt. After a quick taste of the mixture, I realized it needed more zest. It was here I added the quarter cup of colby-jack cheese and three more dashes of salt.
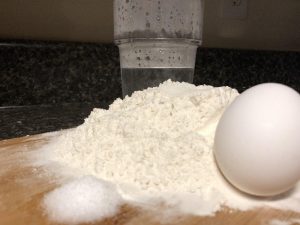 Now for the dough! For this part of the recipe, I needed: one and a half cups of flour, half an egg, half a teaspoon of salt, and three-quarters of a cup of warm water. While the potatoes cooled I began to combine these ingredients to mold the dough that would become a pocket-sized home for a tablespoon of the savory mixture we just finished mixing. Because I did not have a stand mixer, I used a regular baking bowl. In it I combined the light flour, the salt, and the warm water. It was quite tricky adding the egg since I only had to add half. Using the handy, dandy shell I was able to remove about half of the yolk and half of the egg whites.
Using my hands, I combined the ingredients to create the beginning of a sticky, dough-like substance. Using the back of a mixing spoon, I imitated a bread hook and mixed the dough a little bit more, so it wasn’t as sticky. After the dough was perfectly mixed, I dusted the counter with flour and laid out my dough. Since I was out of a rolling pin, I grabbed a bottle of wine to roll out the dough to peak thickness. Nothing stopped me from taking a few swigs while I worked; making these mini masterpieces is exhausting.
 Once the dough was rolled out, I used the open side of a cup to cut out the classic circle shape in the dough. I continued to do this until I ran out of dough to cut from. When cutting out the circular dough pieces, be sure to not stack them on top of one another because they are sure to stick. Believe me, I know from experience. It’s a pain to pull them apart after the fact.
 Now it’s time to put together these two delicious creations. On the cutting board, I laid out each circle of dough and placed a tablespoon of the delectable mixture in the first third of the dough circle. From there, I gently pulled one side of the dough to the other, blanketing the potato mixture in its safe, dough cocoon. Once the edges were lined up, I forked the edges of the dough to ensure the savory insides stayed intact.
When it came time to finally cook the pierogis, I began to boil another pot of water on the stovetop and added three tablespoons of water and one tablespoon of salt to give the pierogis an extra zest while cooking. You don’t want to add too many pierogis to the pot at a time, so I found it safe to only add four. This savory masterpiece has finished cooking once they’ve risen to the top, typically about 2-3 minutes.
While this last step is optional, I wanted to give my pierogis an extra special touch at the end, so I heated up the frying pan once again and added a tablespoon of butter. Four by four I added the pierogis to the pan and sautéed them until they reached a beautiful golden brown.
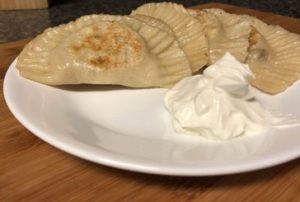
Don’t they just look delicious! Paired with a scoop of creamy sour cream, I was finally able to enjoy the fruits of my labor, or my perfect, plentiful pierogis.
RUSSIAN PIEROGI {PIEROGI RUSKIE}
- YIELDS:ABOUT 60 PIEROGI
- Recipe adapted from Polish Your Kitchen blog
INGREDIENTS
- Filling:
- 2 lbs of potatoes
- 16 oz of farmer’s cheese
- 1 large onion
- 2 tbs of butter
- 1 tsp of salt
- 1 tsp of freshly ground pepper
- 1/2 cup colby-jack cheese
- Dough:
- 3 cups of all purpose flour
- 1 tsp of salt
- 1 egg
- 300 ml (1 1/4 cups) of warm water
INSTRUCTIONS
- To make a filling, peel and boil potatoes in salted water until soft. Drain and set aside to cool.
- Mince the onion and sauté in butter until golden brown.
- If using farmer’s cheese*, crumble with fork and set aside.
- When potatoes cool, mash with a hand masher, add onion, cheese, salt and pepper. Mix until combined. Taste and add salt, if needed.
- To make the dough, combine all ingredients to form dough. Roll out in batches into about 1/8 in thickness. With a glass rim cut out circles. Place a dollop of filling in each circle, and seal them tightly (see video below for 2 methods of sealing).
- Fill a large pot with water, add a tbs of water and oil each. Once water starts boiling, turn down to LOW. Place a few (about 10, not to overcrowd) pierogi into boiling water, and LIGHTLY stir, to prevent sticking. Let boil for about 3 minutes, until they all float up to the top. Take out and lay out on a clean surface, so they are not touching.
- You can serve immediately.