Swedish Butter Cookies
By Courtney Watson • April 28, 2018
Curiously flipping through a Swedish cookbook full of traditional dishes, I was amazed at the horizons that were at my fingertips. Inquisitively, I kept flipping to the back of these cook books where the final delicacies are written: the desserts. I discovered a spread of delicious desserts. I took it upon myself to explore these desserts and make something that is a traditional Swedish cookie, Butter Cookies. I became alert and immediately intrigued by these two words. I remember spreading thick layers of butter on toast growing up as well as never being able to keep my hands out of the cookie jar. There was no way I could pass up this recipe with two of my favorite things as the title.
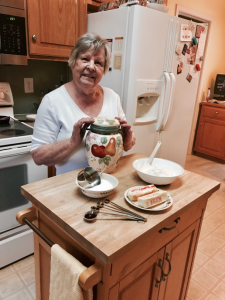
To accept this challenge, I had to have my professional baking grandmother, Nana, help me accomplish my baking goals. She has taught me everything I know about baking and cooking growing up, and I love spending every opportunity to cook with her that I can get.
Now, as my Nana says, no matter what type of cuisine you are cooking, baking is a science. Every measurement, ingredient, and utensil used has to be used strategically and precisely in order to make the masterpiece that you are going to create. I made sure we did just that.
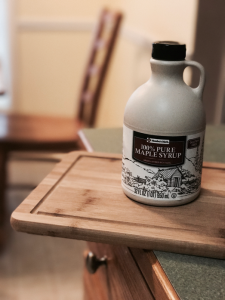
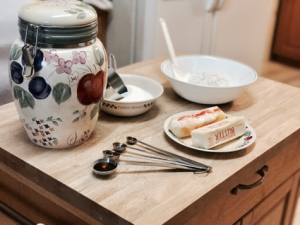
To get started, I took a look at the ingredients: Butter, Maple Syrup, Flour, Baking Soda, Granulated Sugar, and Confectioners Sugar, and all purpose flour. “All right, pretty simple,” I thought. Pro Tip: DO NOT USE A BUTTER REPLACEMENT. No margarine, or anything along those lines. Pro Tip: Don’t show up at your Nana’s who bakes religiously with margarine for butter. She won’t be thrilled. I arrived at my Nana’s with sticks of margarine and was basically scolded for believing the two were nearly the same. Butter is the only acceptable thing to make this dish as rich as it should be, given that “butter” is in the name of the cookie.
Luckily, I had all of these ingredients on hand (score!). Oh, except the butter I had to thaw from my Nana’s freezer. But, if you are in need of shopping for these ingredients, they can all be found at any local grocery store or super market. The main thing I had to remember when I was gathering ingredients is to use real butter and pure maple syrup. I wanted to make sure my cookies were as dense and tasty as they should be.
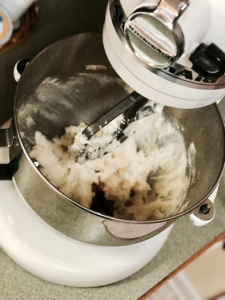
Finally, the cookie making began! I dragged my Nana’s one-million-pound Kitchen Aid mixer out of the cabinet and plopped it on the counter. Obviously, I am used to the hand mixer in my college apartment. I started the process by using this monstrosity of a mixer to cream the softened butter and sugar together. The butter HAS to be softened, or these two ingredients will not blend together to make the smooth and creamy texture that they need. The soft butter blended with the sugar, looking extremely fluffy like a cloud. To me, it worked best to start on the low setting of the mixer and as the ingredients start to blend and then move to a higher setting. According to my Nana, this kept the sugar from flying out of the bowl and making her kitchen all grainy and sticky.
While the sugar and butter were doing their thing, my Nana made sure to make the most of our time by having me start to combine the baking soda with the all purpose flour. Using a small whisking utensil worked best for this. By shifting it around the two ingredients, it effortlessly caused these two powders to become one.
After I had the final dry ingredients ready to add to the mixing bowl (except the confectioner’s sugar), I added in the maple syrup to dissolve into the sugar and butter mixture. I drizzled in my pure maple syrup and mixed it in with the creamy sugar and butter mixture in order to infuse it with the rich, maple flavor. This step added a bold, delicious maple taste to the cookie batter. The mixture turned to a richer, golden color from the syrup.
From here, it was time for me to add in the dry ingredients to the maple syrup, sugar, and butter mixture. Just like mixing the sugar in with the butter, I only added about a half cup of the flour/baking powder mix into the mixing bowl at once so that it blends effortlessly and perfectly. This made the batter absolutely perfect. Pro Tip: Be sure that every time you stop the blender to mix in the dry ingredients that you are using a spatula to push down any of the mixture stuck on the sides of the bowl or on the mixing spoons.
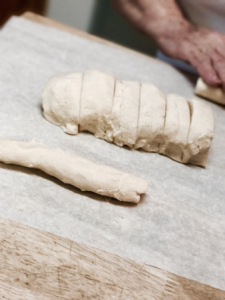
From here is where the recipe gets tricky and a little bit confusing. So, hold on to your horses! I found it is easier to do this together, so find a baking buddy (or I can be your online baking buddy), to engineer this together. Honestly, I would have quit and thrown these cookies in traditional round dough shapes had I not had my determined Nana with me. Now, the time came to get the dough out of the mixing bowl. I laid a piece of parchment paper down on my kitchen island so I wouldn’t lose a bunch of dough in the battle between its stickiness and the cool counter top. Once I got the dough out, it needed to be split into eight different sections. I found this easiest by making it into an even log shape. From there, I cut it in half, then into fourths, then into eights to get a perfect measurement. It might not be pretty, but the evenness is what matters here! Pro Tip: If you’re lucky like me, your boyfriend and Poppy might be in the other room to help you decide the best way to do this. Nana and I don’t have minds that wrap around measurements and mathematics.
After I worked through the mystery of getting the dough separated into eight different sections, it was time for another curve ball. You’re really going to have to trust me on this one. Get ready for the most unique cookie building ever. Each of these eight sections needed to be rolled into nine-inch long logs. The best of these delicious treats is yet to come. I found that the easiest way to do this is by taking one section at a time and rolling it out as evenly as you can into these logs. It is okay if they are not perfect! Mine definitely were not.
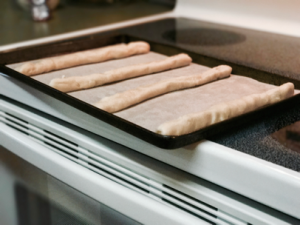
I know that most cookies usually are placed in the oven in the shape they will be served in, but these are special cookies. I slid these logs into a 300-degree oven for twenty-two minutes. Don’t forget I had a professional with me, so continue trusting the process.
After the cookies are finished baking, I took them out and put them on the island that wouldn’t be burnt by the scorching pan. What you are going to see will blow your mind! These “logs” have melted into a perfect, long, large rectangular cookie.
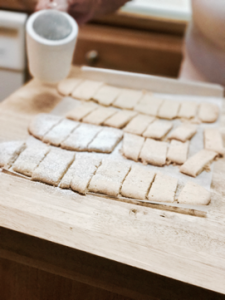
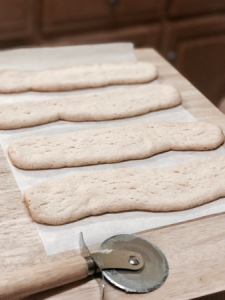
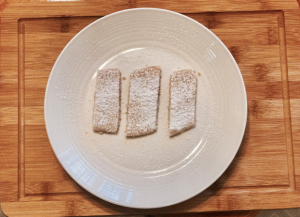
Once the pans cool off enough, I went ahead and got the cookies onto a cool surface so they would not continue to cook and will stay soft (my cookies were a little crunchier then I would have liked). Next time around, I will be sure to get them off the pan more quickly! Once they have almost finished cooling, I cut the cookies into one inch squares, meaning each log will create nine cookies. That’s right! This recipe ended up making 72 cookies (another score!). Once you get them cut, go ahead and dust them with as much powdered sugar as your sweet tooth would please. For me, this means I gave a heavy hand for these suckers.
Voilà! Or, in Swedish, Jippie! This low ingredient, laid back traditional Swedish dish was the perfect afternoon for my nana and me. They pleased the whole family for sure. They were rich, crunchy, soft, and sweet all in one bite. I never had any doubt about these cookies considering they are a Swedish recipe that has been passed down for generations. I definitely think these are a new staple recipe of mine. If you try these, enjoy the time baking them with loved ones, and devouring them during the aftermath.
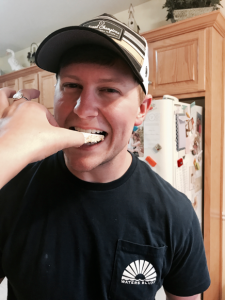
Oh! One last pro tip: These cookies are boyfriend approved! Enjoy.
Swedish Butter Cookies
Ingredients:

1 cup butter (no substitutes), softened

1 cup sugar

2 teaspoons maple syrup

2 cups all-purpose flour

1 teaspoon baking soda

Confectioners' sugar
Directions:
- In a mixing bowl, cream butter and sugar. Add syrup; mix well. Combine flour and baking soda; gradually add to creamed mixture. Divide dough into eight portions. Roll each portion into a 9-in. log.
- Place 3 in. apart on ungreased baking sheets. Bake at 300° for 25 minutes or until lightly browned. Cut into 1-in. slices. Remove to wire racks to cool. Dust with confectioners’ sugar. Yield: about 6 dozen.